These instructions are for creating a widget that will represent only one tag at a time. But, just as a meter can be used for many types of tag, your custom tag widget can be configured so that you may link it to any one of many types of tag.
To create a tag widget that can be linked to one tag:
- Choose a tag and draw it using one or more widgets.
Alternatively, draw one or more widgets and link them all to the same tag. - Add context such as images, pipes, text and shapes.
- Select the components that will make up the widget.
- In the ribbon, click Group.
You could also right-click on one of the selected objects and click Group from the menu that opens. - Select New Widget as the type of group.
The New Widget dialog opens. - Provide a name for the new widget, replacing the default word, "Widget".
- Ensure that the option, New Tag Widget, is selected.
- Select the tag that was linked to the component widgets.
- Click OK.
Results:
- The original objects are removed and replaced by an instance of the new widget. The yellow diamond in the upper left corner is a Tag Icon Marker, which may be used to indicate questionable or manual data. It can be removed from the widget if you do not want to make use of this feature.
- The new widget has been added to the Widgets palette. You are advised to edit the menu to store your widgets in a sub-folder rather than adding them all at the top level of the palette.
- As you drag instances of this widget onto pages, you can now link them to any instance of the same type of tag that was used when creating the widget. You can edit the parameters of the widget to expand the types it can be linked to.
- If you draw an instance of the tag from the Tag Browser, you will find that the new widget is now a native option for that type.
Example: Create TankLevel

Tank Level
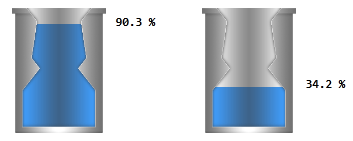
This tag widget, TankLevel, is designed to represent analog values as a tank filling with water. The numeric display rises with the water level. TankLevel will become a native widget for use by any Analog tag.
- Create at least one Analog Input or Analog Status tag.
- Open the Idea Studio.
- Select the Widgets palette and open the Basic Components >> Bars folder.
- Drag a Color Fill widget onto the page.
Adjust properties as you like. In this example the fill color was set to blue. - Link the Color Fill to your Analog Status or Analog Input tag.
- Select the Images palette and open the Tanks folder.
- Drag a tank with a cut-away to the page (Tank26 was used in the figure.)
Place it over the Color Fill. - Adjust the image or the widget so that the Color Fill matches the cutaway of the tank.
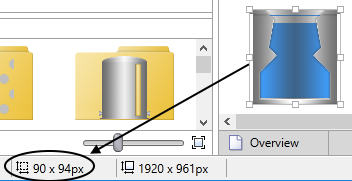
- Make note of the size of the Color Fill:

- In the Widgets palette, browse to the Text folder.
- Drag the widget Numeric Value onto the page.
- Position the Numeric Value to the side of the tank, even with the bottom edge.
- Link the Numeric Value to your Analog Status or Analog Input tag.
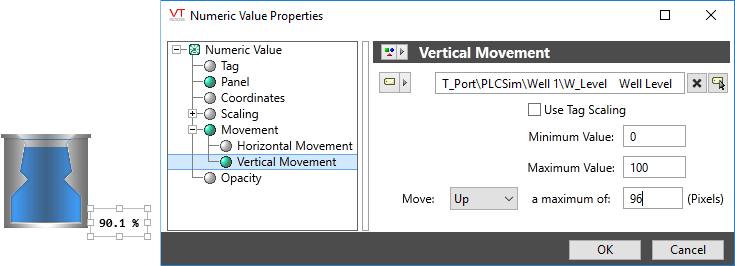
- Open the properties dialog of the Numeric Value and select the Vertical Movement option.
- Select the same Analog Input or Analog Status tag that you used for the rectangle scaling.
- Set the maximum pixels to be the same as the height of the Color Fill (or a little less).
- Ensure that the movement direction is Up and that the Use Tag Scaling option is selected.

- Click OK to close the dialog.
- Select all three objects that you have drawn.
- Click, Group in the toolbar, or right-click and select Group from the pop-up menu.
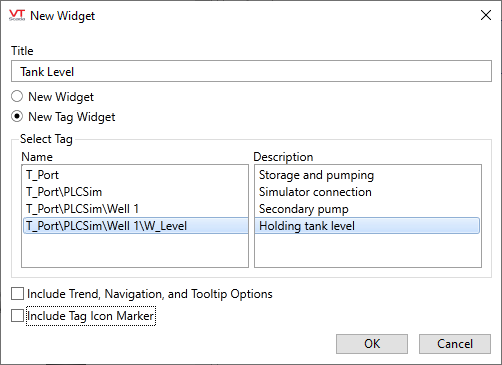
- Select the option, New Widget.
- In the New Widget dialog, provide the name Tank Level.
- Ensure that the Tag Widget option is selected.

- Click OK to finish.
- Right-click on the new widget and click Edit in the menu that opens.
- Open the Widget Properties tab in the ribbons.
- Click Tag Types in the ribbon.
The Edit Parameters dialog opens. Whichever tag type you used above is shown in the list of associated tag types. - Add other analog type to the list of associated tag types.
- Click OK in the Edit Properties dialog to save your work.
- Close the widget editing page.
Tank Level will now be listed in the Widgets palette. You can drag it onto any page and link it to any of the types you selected in the Edit Parameters dialog.
Troubleshooting:
- On attempting to group the objects, an error message complains that some are not linked to a tag.
All tag widgets within the selection set must linked to tags before they can be grouped. This does not interfere with your ability to use the widget for other tags later.
