Select and Arrange
It is usually the case that you will want to adjust things after you draw them on a page. They might need to be aligned with other objects, nudged a bit up or down, or have their display order changed so that they do not "hide" behind other objects. In all cases, you must select objects before using the format tools.
To treat a selection of several objects as one you may choose to create a temporary group using the objects.
The Multi Image Widgets panel may be configured to open automatically whenever a multi-image widget is selected. This may be inconvenient at times. You can disable this behavior within the Multi Image Widgets panel.
Click on an object.
A left-click selects the object. A right-click selects the object and opens the related context menu.
Any other objects that were already selected will be deselected. You can use this to cycle through objects that overlap.
Ctrl-Click and Shift-Click.
Both are the same. Hold the Ctrl key or the Shift key down while clicking on objects. Adds or removes objects to/from a selection set. Other objects that were already selected remain part of the selection set.
Use the Layer panel to choose the anchor![]() One object within a selection set, indicated by a bold border. Tools to align and to match properties will use this as the reference object. object within a selection set.
One object within a selection set, indicated by a bold border. Tools to align and to match properties will use this as the reference object. object within a selection set.
Click on an empty spot and drag the cursor over one or more objects.
Sometimes, referred to as a sweep select. A right-to-left selection gathers only objects completely inside the window.
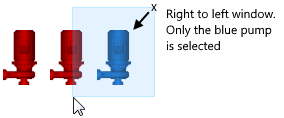
Right-to-left is a window selection
A left-to-right selection gathers every object it touches.
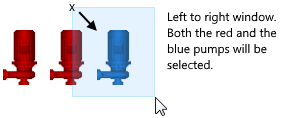
Left-to-right is a crossing selection
The Shift or Ctrl keys work with a window in the same way that they work with individual clicks. Objects will toggle between selected and deselected without any effect on the selection set outside the window area.
Press Ctrl-A on the keyboard
All objects on the page will be selected.
Use Select All in the home ribbon
This is the same as pressing Ctrl-A on the keyboard.
Use "Select of this type" in the home ribbon
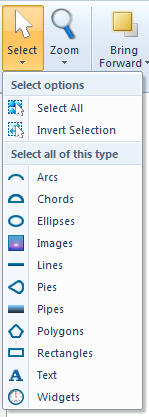
Selects all objects of the chosen type.
Use Invert Selection from the home ribbon.
In a crowded page, you may find that it's easier to select the objects that you don't want. If so, you can select those and use Invert Selection to swap them for the objects that you did want to select.
A group is a collection of objects, joined together for the purpose of selection and editing.
Groups are named automatically and are not added to any of the palettes. You can copy and paste groups, but there is no list of groups to select from.
Use groups as an extension of the selection tools. Groups are very helpful to use when editing your pages. They allow a set of objects to be treated as a single item. In a crowded page, it is much easier to click on one part of a group to select the whole than to try to select each and every component.
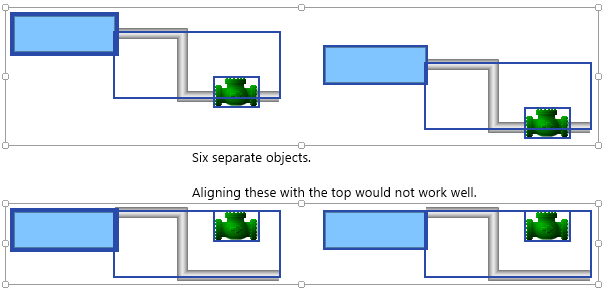
Alignment of individual objects
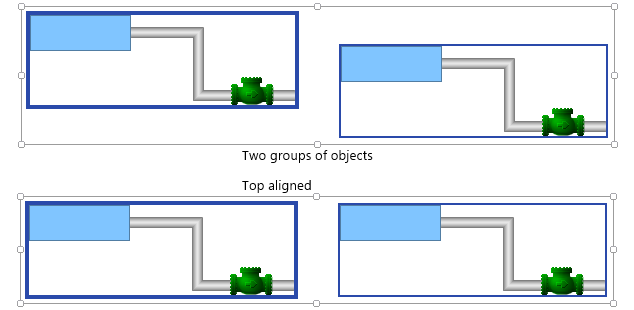
Alignment of grouped objects
- Select the objects that are to be included in the group.
- Expand the Group option in the toolbar and click "Group".
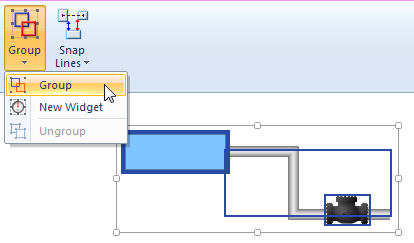
You could also right-click on any member object, and click "Group" from the menu that opens.
Formatting commands apply to a group as a whole, but are more limited for the group than for the component objects. For example, a group cannot be rotated, even if the component parts could be.
In essence, a group is a page drawn on another page. If you click the Edit command for a selected group, it opens as a page, where the individual components may be modified, and new parts added. For advanced developers, each group is stored in a .SRC file, using exactly the same format as found in a page or widget's source code file.
A group may be ungrouped as easily as it was first assembled. An "Ungroup" command can be found in both the toolbar and the right-click context menu for each group.
