
Lines can be drawn in any color, and have any width from one to thirty pixels. By default, each new pipe will be black, and have a width of one pixel. Lines differ from pipes in that they do not have a gradient shading.
As you draw a line, each segment will snap to a multiple of fifteen degrees. To release the snap feature and draw at any angle, hold down the Ctrl key on the keyboard as you move the mouse.
Multiple segments that lie along a straight line will be merged into a single segment.
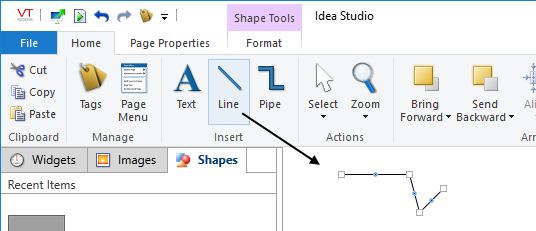
To draw a line:
- Open the Home ribbon in the Idea Studio, and click the Line button.
- Click once on the page, where the line is to begin.
- Move the mouse and click again to mark the end, or the next corner.
- Continue, adding as many segments as required.
To remove points while drawing, press either the backspace key or the delete key, as many times as needed to remove vertices in the reverse order that you added them. - To stop, right-click after placing the final endpoint of the line.
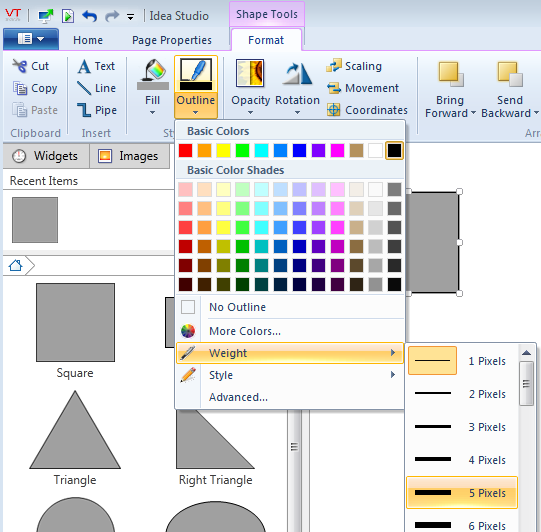
Change a line's color and width:
Having drawn a line, you can adjust both the color and the width using the Outline button in the formatting toolbar. Note that lines do not have a fill property. Selecting the option, No Outline from the menu is the same as making it invisible.
Relocate a line:
A selected line has two types of handle: a white square at each endpoint and a blue dot in the middle of each segment.
- Drag an endpoint handle to move that corner or end. If you straighten a path by dragging a corner into line between connecting corners, the handle will be removed.

- Drag a middle dot to add a new corner.

- Click and drag between handles to move an entire segment. Any connecting segments will stretch with the segment that was moved.

- To move the entire line, select it then tap the arrow keys to nudge the object one pixel at a time.
